
 My next project is the Mariadenmark Edith blouse. The blouse has a vertical dart at the waist, and a horizontal bust dart. As always with bust darts, I found as well as a FBA I needed to move the darts around a bit. I often find I need to do this to get a good fit, and it isn’t a process I see discussed often, so I thought I would explain a bit.
There are a number of ways to transform darts to improve fit – I was surprised with the number of options I came up with when I thought about it.
- Size – do an SBA or FBA to increase or decrease the size of the darts. Mary and Leila both have good summaries of links to tutorials on this.
- Realign the apex. You may need to move the dart vertically if you have a low or high bust, or move a waist dart horizontally. This is done to move the fullness and dart apex (your nipple for a bust dart) because it is not in the same place as the pattern. From experience I can say that you shouldn’t make an adjustment for this until you have applied a FBA/SBA as needed, as this will affect the position of the apex. Again, Mary has links to tutorials to do this.
- Rotate the dart – (detailed below) rotating the existing dart around the apex. As with the apex realignment you shouldn’t make an adjustment for this until you have applied a FBA/SBA as appropriate. Megann and Tatterdemalion also have details on this.
- Split the dart – if the dart is particularly large you may find success splitting it into more than one. I can’t say I have had success doing this having tried it on a few muslins, but it may work for you.
- Reshape the dart – keeping the apex, and beginning and end of the dart, you can curve the dart lines convex or concave to provide extra fabric, or gather excess along the length of the dart (I needed to do this on the back waist dart on my Anna dress).
- Move the fullness elsewhere – you can rotate some or all dart fullness into other features that include extra fullness such as gathers, tucks or pleats. Cennetta has some great examples of this.

My pattern piece post FBA with the widened darts highlighted.
So let me talk you through my bust fitting process for this blouse to show how I came to the conclusion the darts needed some adjustment. First I applied my standard FBA (2” or 5cm on either side, for 4” or 10cm in total). I do the Y-FBA as detailed in FFRP which is better if you are adding more than 1”. As the Edith blouse already has bust and waist darts this enlarges both of these – nothing new is added, which is the simplest type of FBA.
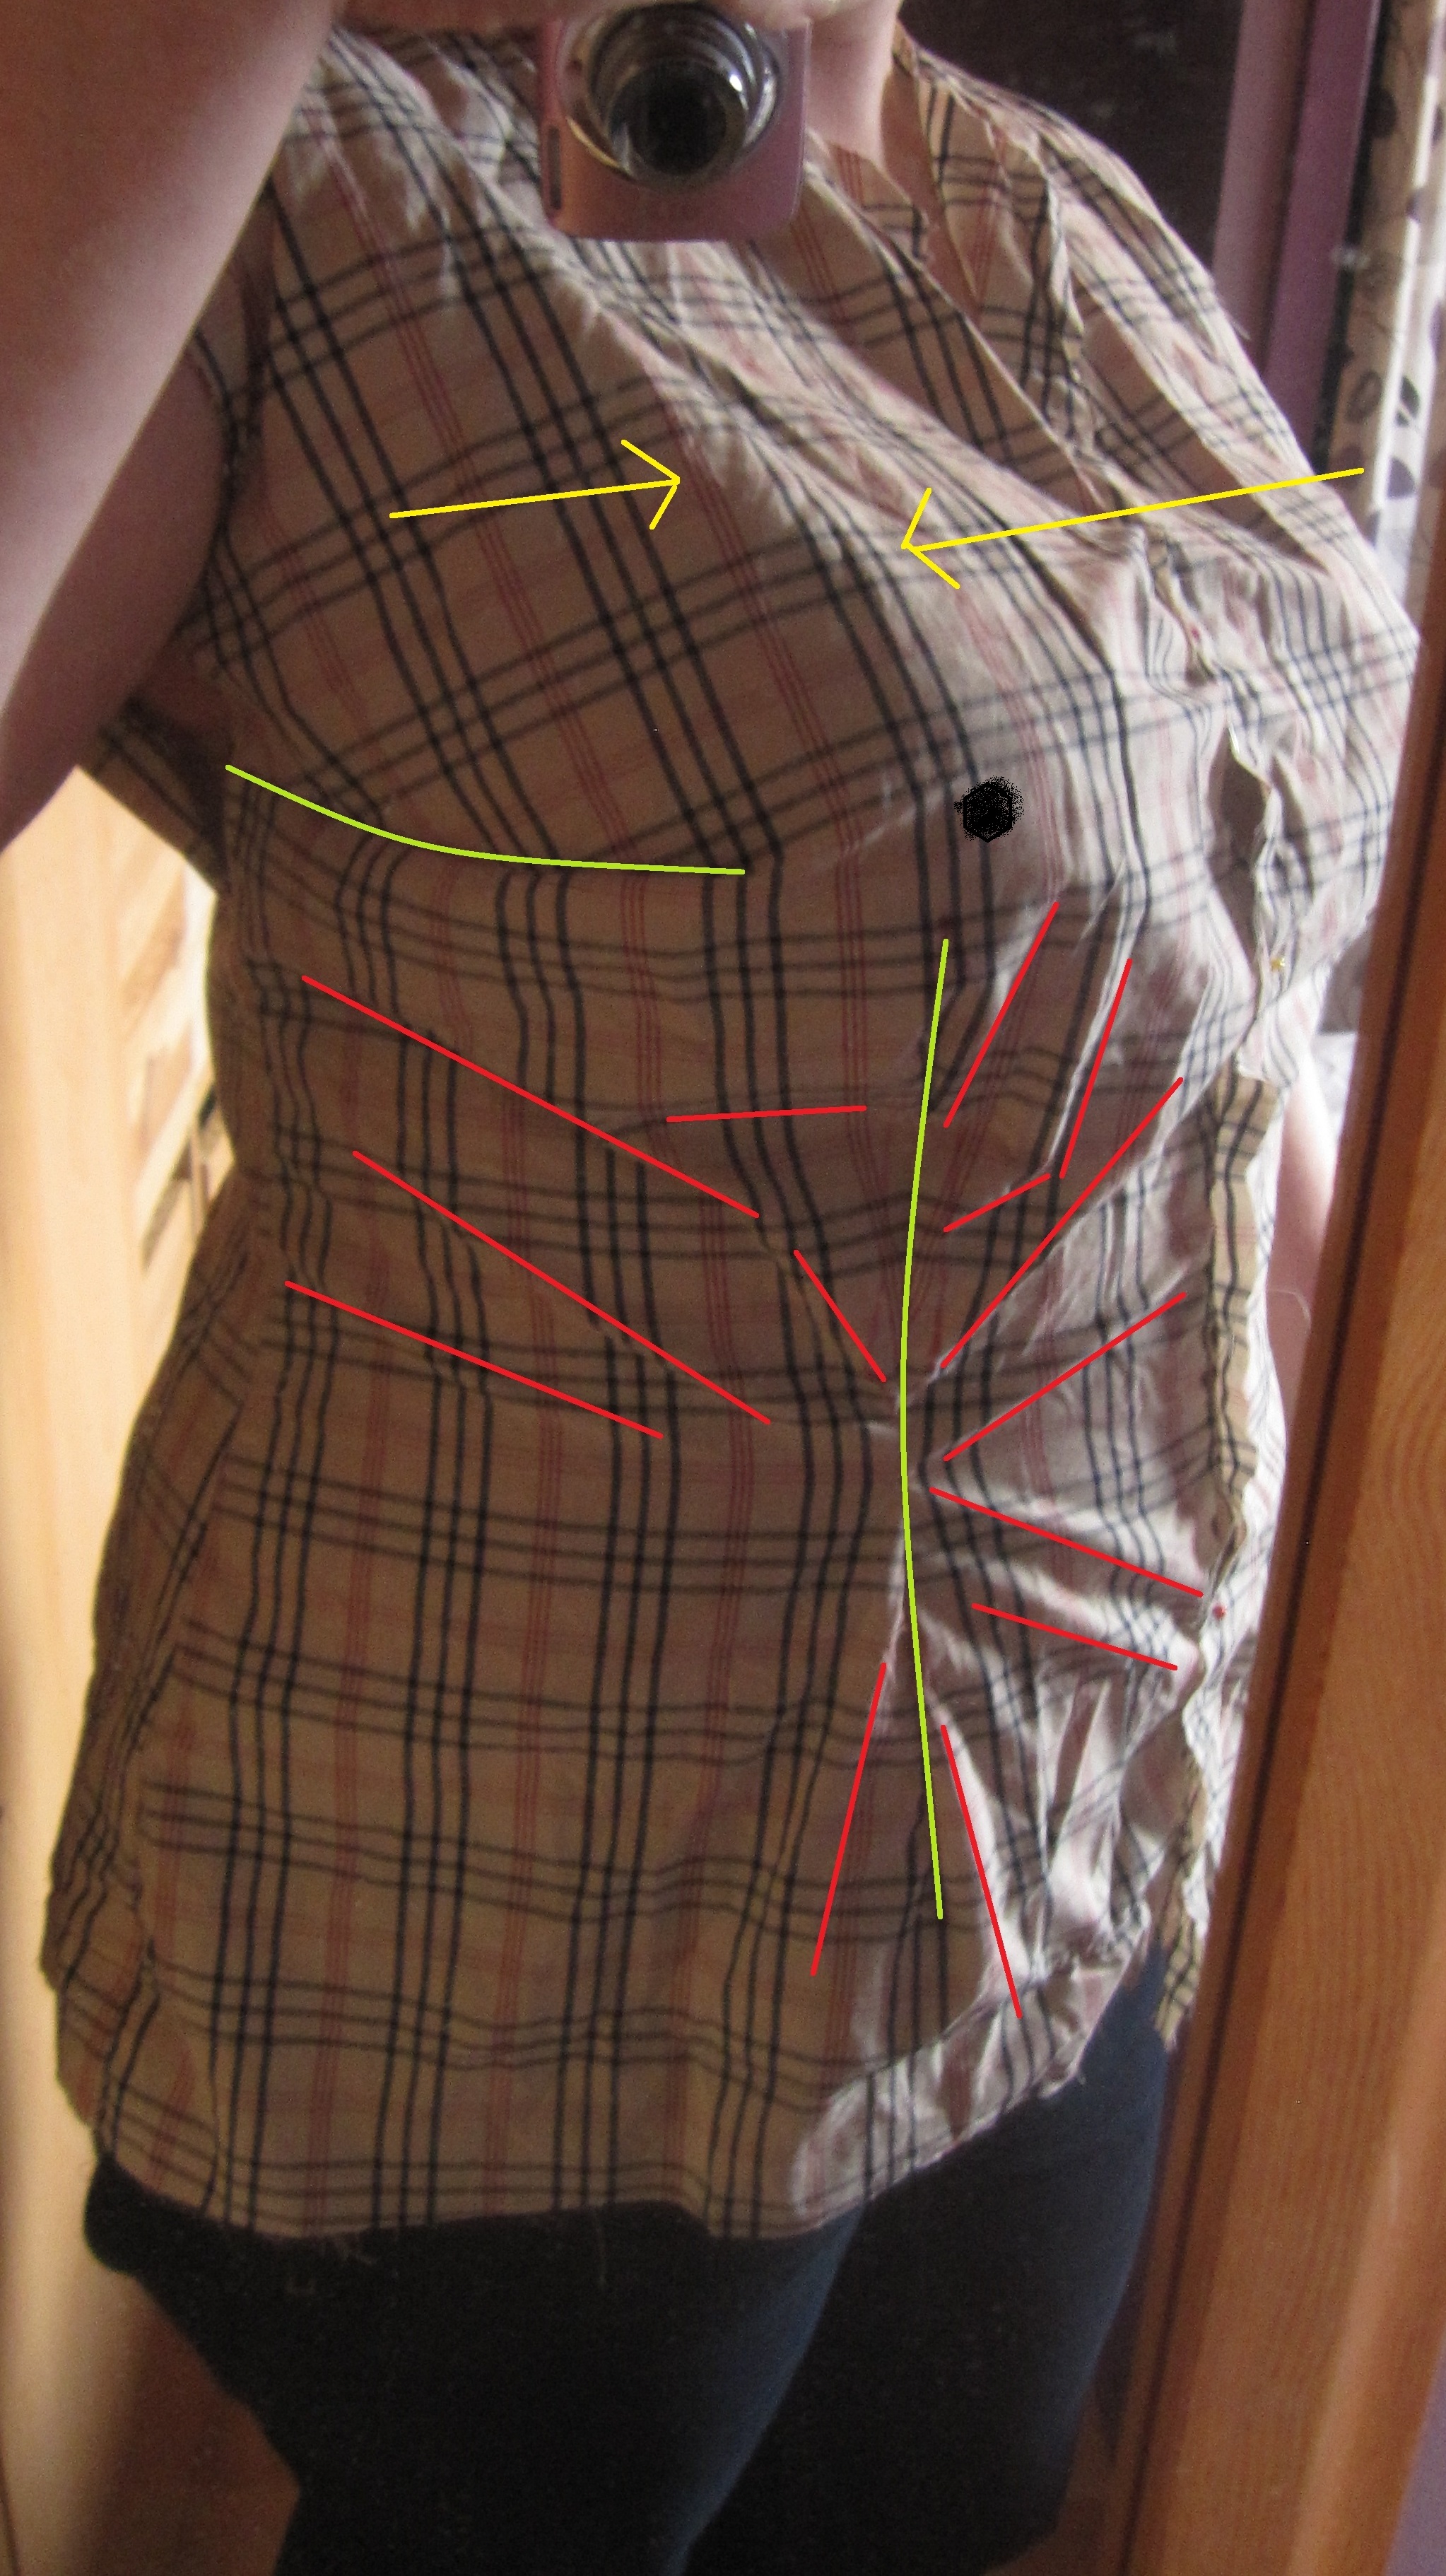 So here is my muslin. As you can see, something is not right; there is loose fabric above the bust by the armhole (yellow arrows), draglines all over the place under the bust (red lines) and slight tightness across and just under the bust (this is not so obvious in the photo). I marked my bust apex (black dot). The horizontal dart (green line) is just about pointing at it, but the diamond waist dart is not (the photo perspective slightly forshortens it, but it is several cm off). The end of this dart is also finishing too high and close to my apex.
I could have adjusted the waist dart on paper by shortening the length and moving the whole dart across on the pattern piece. However, since I had a muslin I unstitched the dart, and then repined it where it wanted to be based on the excess fabric: slightly closer to the centre and slightly shorter. I could then draw this adjustment onto the paper pattern piece, saving myself some paper manipulation, with the knowledge the adjustment is correct.
The horizontal bust dart seemed to be in the right place, but as mentioned, there is excess above the bust and it felt tight across the bust. I could have decided this needed more volume across the bust, but from experience I decided to play around with the dart position first. Therefore, I also unpicked this dart and then played around with the positioning of the excess – doing it this way means the muslin side seams may not work properly, but gives you leeway for some experimenting with the dart positioning along the side seam, which is much faster than trying several options by manipulating the paper pattern. I tried 2 horizontal darts, but that didn’t fix anything. Then, I tried rotating the dart round to above the arm hole to where I had the excess fabric. Suddenly, the whole thing fitted – the snugness across the bust and the excess above was gone. I confess this was not a surprise to me – I have had success rotating horizontal darts upwards before – it seems to fit my bust better. Interestingly this creates a quasi-armhole princess seam – you can see why they work well for the full busted.
Here is the before and after:


It is worth bearing in mind that these fit improvements came from moving each of these darts only about 2cm in each case – these were not drastic adjustments, but the effect is – the drag lines, tightness, and fullness all vanished without changing the size of the darts – just adjusting their position.
 So how do you rotate a dart? First you need to decide where it is going – FFRP has a fantastic diagram showing many of the options (and a page discussing the process).

1. Identify the dart apex and draw lines on the pattern piece from the ends of the current dart legs to this apex. Also mark on the line where the new dart should lie.

2. Cut out the wedge of the old dart, and along the line of the new dart. Ensure a small hinge remains between the two at the apex.

3. Rotate the wedge between the old dart and the new dart to close the old dart. Tape the old dart closed.

4. Fill in the gap behind the new dart space with new paper. Draw in a new dart with the legs starting at the edge of the new wedge, and the end of the dart an appropriate distance from the apex (1” is quoted as standard, but those with a larger bust often want it further out – in this example mine is …)

5. Fold this new dart, and cut along the edge of the pattern piece to trim the edge of the dart – when unfolded this will shape the dart to sew perfectly.

Ta-dah! Finished pattern piece with adjusted and rotated darts – tune in next week for the blouse.

Brilliant! I had the same fitting issues with this top. I’m going to try your solution tonight. Thanks!!